
Why I’m writing this
I wasn’t originally planning to write a blog post about this. I am not on the bleeding edge and others have done it, but I hit some roadblocks along the way and I couldn’t find good answers. In addition, Orlando asked me in #toronto on MacAdmins Slack if I was going to, and how can I say no?
Why I did it
During the pandemic I found that it was a bit painful to get a new Mac up and ready to go out of the box for our teachers at home. While I’m hoping that we will be spending all of the 2021-2022 school year in our actual school, teachers do bring their MacBooks home and Munki will be running in the background and keeping their software up to date off site.
In addition to that, our server was in need of an update. It was acting up in strange ways and couldn’t run the latest version of macOS. If I could put the server into the cloud, I wouldn’t have to worry about managing it. No more certificate updates, no more MAMP, no more copy of MunkiAdmin not working properly.
I could spend $10USD/month for 1TB of data from Wasabi for my 37GB Munki repo. I would get 1TB of data transfer/month and I think that would be more than enough. If I needed to grow it was relatively cheap, and the cost was predictable, unlike Amazon Web Services. If I were to buy a new server, a blinged out Mac Mini with 4 years of AppleCare+ for schools would cost $1800CAD.
Prepping
First thing I did was slim down our Munki repo. I used the repoclean cli tool that is part of the standard Munki install. I didn’t document this and this was quite some time ago, so I’m not sure 100% what documentation I read on it. My Google searching right now is not showing up much from the Wiki. I found it to be pretty straightforward and it worked exactly as expected. I was able to get the repo down to it’s current 37GB.
Since I couldn’t find the documents I used as a resource, he’s here the --help.
Usage: repoclean [options] [/path/to/repo_root]

Options:
  -h, --help            show this help message and exit
  -V, --version         Print the version of the munki tools and exit.
  -k KEEP, --keep=KEEP  Keep this many versions of a specific variation.
                        Defaults to 2.
  --show-all            Show all items even if none will be deleted.
  --delete-items-in-no-manifests
                        Also delete items that are not referenced in any
                        manifests. Not yet implemented.
  --repo_url=REPO_URL, --repo-url=REPO_URL
                        Optional repo URL. If specified, overrides any
                        repo_url specified via --configure.
  --plugin=PLUGIN       Optional plugin to connect to repo. If specified,
                        overrides any plugin specified via --configure.
  -a, --auto            Do not prompt for confirmation before deleting repo
                        items. Use with caution.
In previous years I had two campuses to manage, as such I had two Munki servers, we’ll call them Roy and Moss, because they were called Roy and Moss. Moss was the primary and Roy was a read-only copy. The two were synced using Resilio Sync. When our North Campus closed, we made Roy the only one. Since I had Resilio Sync in action on Roy, I set it up so I had a copy of the repo on my local computer. It made using MunkiAdmin much faster. Before I was connecting via SMB and it took forever to open the repo in MunkiAdmin, now it is nice and fast. Once I press save, it automatically syncs to both Roy and Audrie’s1 MacBook.
Now I had a local copy of Munki. Running AutoPKG updates was much easier and quicker, and pushing it to an S3 bucket would be easy peasy (in theory).
Setup a bucket and connect
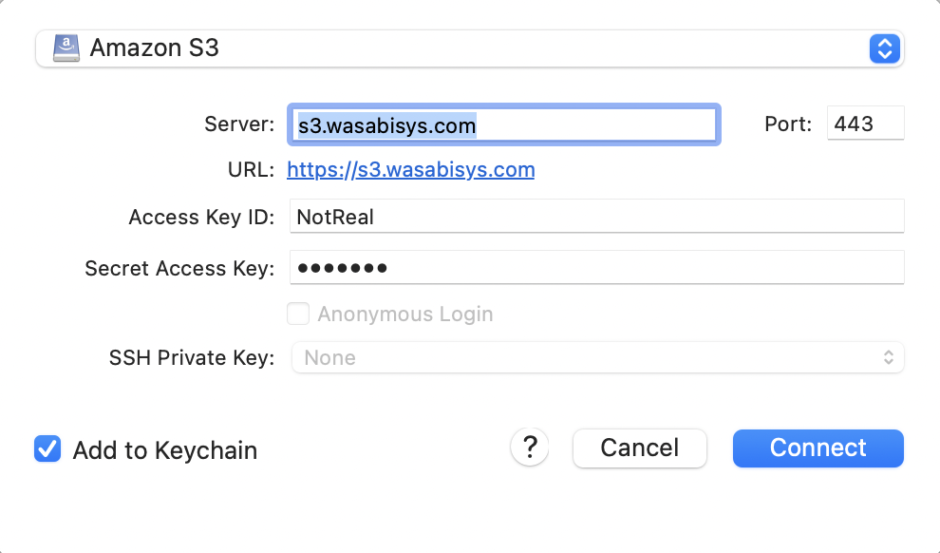
I setup a demo account with Wasabi, created a bucket and created a read and write key pair for the user. I used the Root Account Key and downloaded the key pair to my computer. I launched Cyberduck and prepared to use for something other than SFTP for the first time.
Keep your Access Key and Secret Key somewhere safe and private.
Once in Cyberduck, I was able to test. I was able to create files in the bucket and delete files in the bucket.
Setup AWS CLI
S3 is a standard, I assume made by Amazon Web Services, but I could be wrong. Amazon however have the default command line interface for S3 buckets as part of AWS CLI2.
Installing the CLI was pretty easy and straight forward, however, rather than using the code below, I’d suggest you please visit Amazon’s documentation and get the information directly from them.
curl "https://awscli.amazonaws.com/AWSCLIV2.pkg" -o "AWSCLIV2.pkg"
sudo installer -pkg AWSCLIV2.pkg -target /
First things first, I ran this to confirm aws was installed.
aws --versionThen I ran this to setup aws.
aws configure
AWS Access Key ID []: ACCESSKEYHERE
AWS Secret Access Key []: SECRETKEYHERE
Default region name []: Canada-east-553
Default output format [None]: (leave blank)
Sync the Munki repo
aws s3 sync ~/PATH/TO/munki_repo s3://BUCKETHERE/munki_repo --endpoint-url=https://s3.REGIONHERE.wasabisys.com --deleteObviously change the PATH/TO to point to your munki_repo, change the BUCKETHERE to your bucket name, and change REGIONHERE to the region you’re stored in.
One thing I would change if I were to redo this from scratch is to get rid of /munki_repo in the S3 path. I don’t need a subfolder in my Bucket. That makes no sense. I would have it look like this instead.
aws s3 sync ~/PATH/TO/munki_repo s3://BUCKETHERE --endpoint-url=https://s3.REGIONHERE.wasabisys.com --deleteBut we’re going to move forward with this as it is.
This part took a LONG time. For those in Canada, you know our internet infrastructure sucks. I’m on DSL with 25 down and 10 up.
EDIT: Setup read-only key
Yikes, I forgot to include this part. In Wasabi I setup a readonly key pair. It’s basically the exact same as this, but a few minor navigation changes for Wasabi.
https://github.com/waderobson/s3-auth/wiki/Creating-Read-only-Users
Going forward use this key pair, you only want the read/write key pair for syncing. Munki clients should be using the read only pair.
To test this pair, I setup a Google Cloud Console session and installed the linux AWS CLI tool and ran the configure command. Once it was setup with this pair I ran this.
aws s3 cp s3://BUCKETHERE/munki_repo/manifests/site_default . --endpoint-url=https://s3.REGIONHERE.wasabisys.comThis copied the site_default file to the current directory, so I was able to check that it could get the file.
I use CloudShell already for gam, and as such, it was easy to setup there.
Client setup
I have a stack of computers that need to be wiped for new staff. So I grabbed one, used AirDrop to send over Install macOS Big Sur. It was the 11.5.2 installer that I pulled by using Armin Briegel‘s Download Full Installer.
I put that app into the /Applications folder on the target Mac, I right-clicked on the app and chose open. Sometimes it opened, sometimes it jumped in the dock for a while before stopped, at which point I right-clicked on the app again and chose open. Then it would open and I could quit it and run the terminal command.
echo 'P@55w0rd' | '/Applications/Install macOS Big Sur.app/Contents/Resources/startosinstall' --eraseinstall --agreetolicense --forcequitapps --newvolumename 'Macintosh HD' --user adminuser --stdinpassObviously, replace “P@55w0rd” with your adminuser password, and replace adminuser with your adminuser’s username.
20-30 minutes later, I had a fresh install of macOS on the client computer. I connected to wifi, and Apple Device Enrollment kicked in. At this point the only thing I needed to do was set the timezone and I was on the desktop.
I needed to install the middleware so that Munki could talk to the S3 bucket. I needed to follow the wiki from the middleware.
sudo curl https://raw.githubusercontent.com/waderobson/s3-auth/master/middleware_s3.py -o /usr/local/munki/middleware_s3.pyEasy peasy. I confirmed it was there in /usr/local/munki and then I needed to update the ManagedInstalls.plist file so I could
sudo defaults write /Library/Preferences/ManagedInstalls AccessKey 'AKIAIX2QPWZ7EXAMPLE'
sudo defaults write /Library/Preferences/ManagedInstalls SecretKey 'z5MFJCcEyYBmh2BxbrlZBWNJ4izEXAMPLE'
sudo defaults write /Library/Preferences/ManagedInstalls Region 'us-west-2'
Then I ran Munki on that computer, AND HOLY SHIT IT WORKED! Wait, why is it working? That shouldn’t work. I’m really confused. Oh well, I have a lineup at my office and I will let that run, then get back to it.
Let’s look at the logs. Oh, it’s pulling from the old server. How is it pulling from the old server? It shouldn’t be pulling from the old server. Oh wait, I never told it to pull from the new server. I missed step 3 in Wade’s instructions. I’m not sure why it’s a separate step, but it is.
sudo defaults write /Library/Preferences/ManagedInstalls SoftwareRepoURL "https://S3_BUCKET_GOES_HERE.s3.amazonaws.com"So that is going to be slightly different for Wasabi.
sudo defaults write /Library/Preferences/ManagedInstalls SoftwareRepoURL "https://s3.REGIONHERE.wasabisys.com/BUCKETNAMEHERE/munki_repo"Obviously if I was smarter, I wouldn’t have put in that subfolder of munki_repo and I could have done this as:
sudo defaults write /Library/Preferences/ManagedInstalls SoftwareRepoURL "https://s3.REGIONHERE.wasabisys.com/BUCKETNAMEHERE"At this point I was running into errors. I was getting errors
b'<?xml version="1.0" encoding="UTF-8"?>\n<Error><Code>AccessDenied</Code><Message>Access Denied</Message><RequestId>REMOVED</RequestId><HostId>REMOVED</HostId></Error>’I posted to the #munki asking for help in a very detailed way. An anonymous person asked for further information from the logs and confirmed that the middleware was indeed being activated. I didn’t see any keys in the headers from what Munki was pulling, but as I was looking through the python I saw this line.
S3_ENDPOINT = pref('S3Endpoint') or 's3.amazonaws.com'I recognized endpoints as a thing! Because I was using Wasabi and not AWS, I needed to specify the endpoint in the CLI as above… see:
--endpoint-url=https://s3.REGIONHERE.wasabisys.comSo I had to set ManagedInstalls.plist to have the right info
sudo defaults write /Library/Preferences/ManagedInstalls S3Endpoint "https://s3.us-east-2.wasabisys.com"Run Munki… HOLY SHIT IT WORKS!
It actually works!
I ran AutoPKG to get some updated packages for it to pull down, synced it to Wasabi, and reran Munki, and it did it!
Done?
Not quite. Let’s test it again.
Get another computer, do it all, why isn’t it working? Oh, I forgot to set the S3Endpoint again. Stupid Adam.
Okay, this time I’m not fucking up. Adding to Mosyle’s fresh Munki install script a line to install the middleware.
# install middleware for Wasabi bucket

curl https://raw.githubusercontent.com/waderobson/s3-auth/master/middleware_s3.py -o /usr/local/munki/middleware_s3.py
Then I created a custom command in Mosyle to setup ManagedInstalls.plist
I already had one, which does it for the on-prem server. So I duplicated that and changed the settings. I put in exceptions for the old script so it doesn’t go to all my new computers, and told this new one to go to computers enrolled to my staging user.
Test it again! Works like a charm!
Let’s test it on my computer. I remove myself from the list of computers that the on-prem ManagedInstalls custom command is sent to. I added myself to the computers that the Wasabi ManagedInstalls custom command is sent to.
It didn’t work. WHAT THE????? I HATE COMPUTERS!
Turns out, I had the middleware set to install during initial deployment of Munki, and my computer had that initial deployment months ago, before I was using the middleware. So obviously it didn’t work, I didn’t have the middleware installed.
I created a new custom command to just install the middleware and sent that to my entire fleet. Remember before when I had middleware installed and first ran it and it pulled from the old server perfectly? That’s going to happen for my entire fleet until I update the SoftwareRepoURL. So it’s there for the future, but also working with the old system.
curl https://raw.githubusercontent.com/waderobson/s3-auth/master/middleware_s3.py -o /usr/local/munki/middleware_s3.pyNow it worked, and I moved Audrie over to the S3 bucket without telling them. On Monday I’m going to confirm that it is installing correctly, and then we can proceed with moving the rest of the fleet over.
Things to do
- At the end of an AutoPKG run make it auto-sync to the S3.
- After save is pressed in MunkiAdmin, make it auto-sync to the S3.
- Move the remaining fleet over to the new S3 setup
- Pull out the physical server from the server room, pull drive, and recycle
Thanks
- Wade Robson who wrote the middleware
- Anthony who helped me proof a long-ass post to #munki to get some help
- The anonymous person in #munki who none of us knows who he really is *wink wink* who had me pulling out specific lines of code from Wade’s middleware where I found the undocumented request for a pref called S3Endpoint
- macfaq and DJH and Treger on Slack for having similar issues and while not able to help, were able to respond to my messages and gave me encouragement